How to Create Password-Protected Documentation
Summary: EazyDocs makes securing your WordPress documentation effortless with a password-protected system. Easily restrict access at both document and section levels by selecting the Visibility option. Your sensitive content stays safe and protected from public view.
While internal documentation protects sensitive information, sometimes you need extra security. EazyDocs offers a password-protected system to keep your documentation safe, restricting access to WordPress documentation that is available publicly.
Create Password-Protected WordPress Documentation
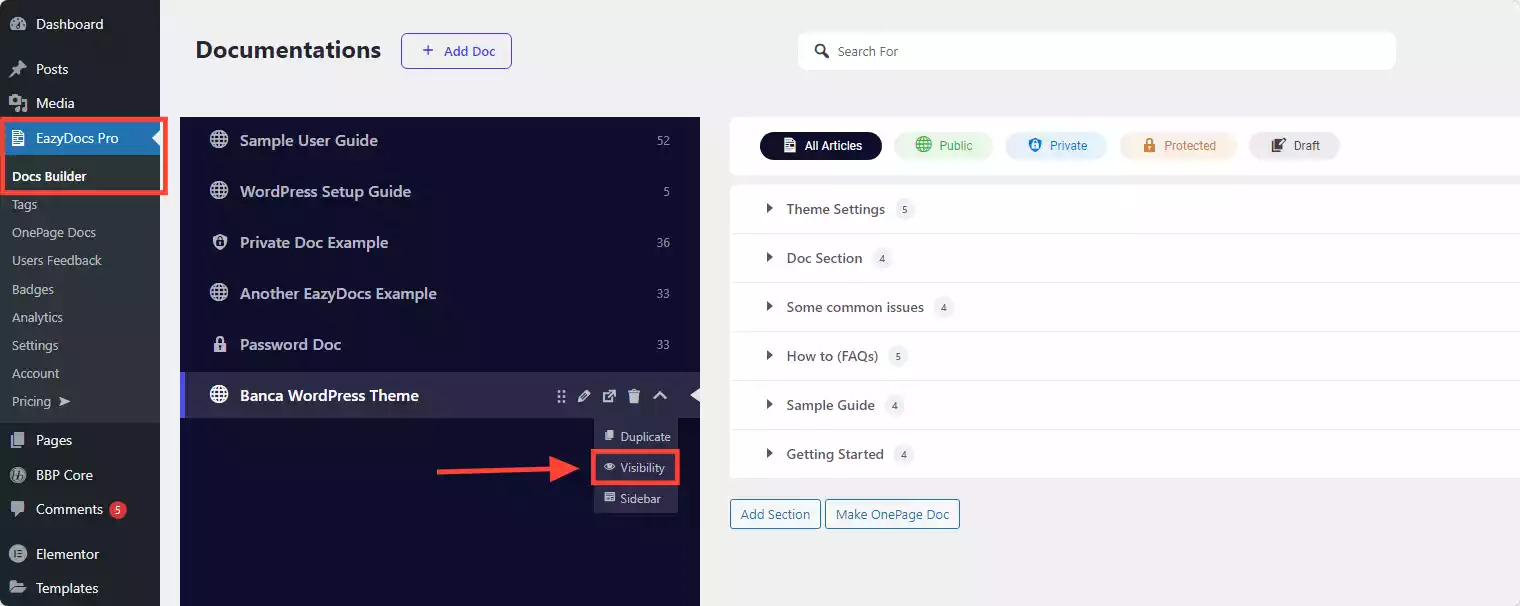
From the [direction] WordPress Dashboard > EazyDocs Dashboard [/direction] select the documentation you want to switch to a password-protected doc setting. Right next to the doc title, click on the arrow icon and click on the Visibility option.
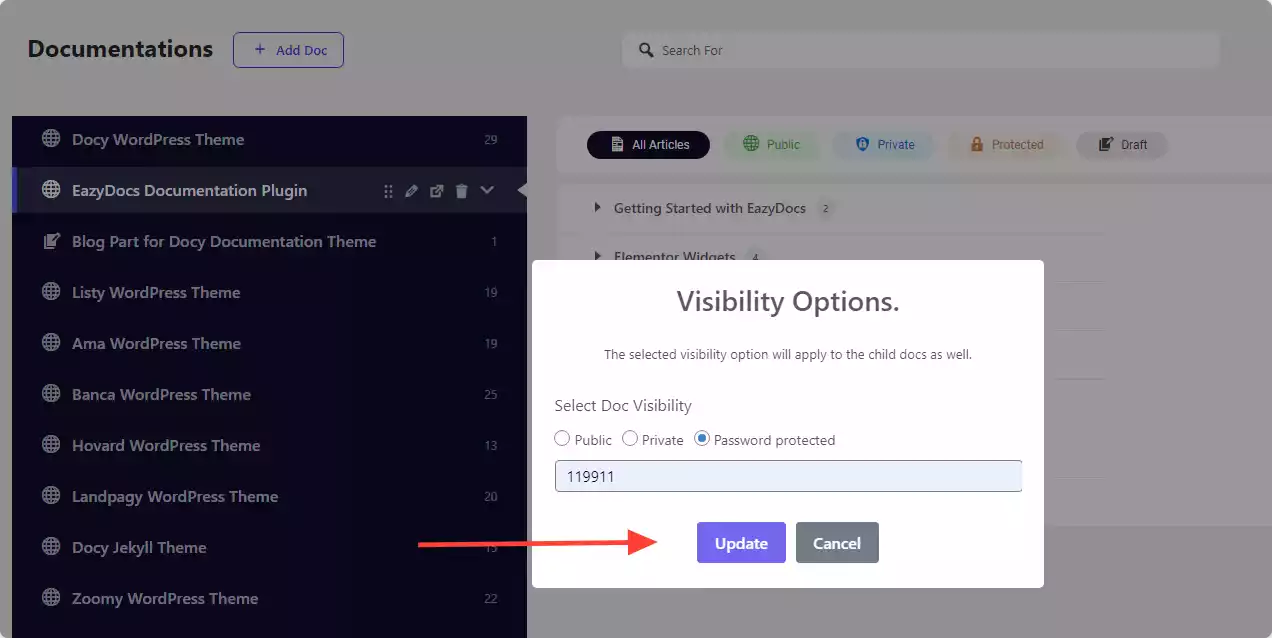
A prompt screen ‘Visibility Options’ will show up; just select the Password Protected option and click Update. That’s it. Your documentation is now password-protected, which can be tested by opening the doc in incognito.Create Password-Protected Documentation Section
Individual documentation sections can be password-protected as well. To password lock any documentation section, hover over the Visibility option icon shown next to the section title.
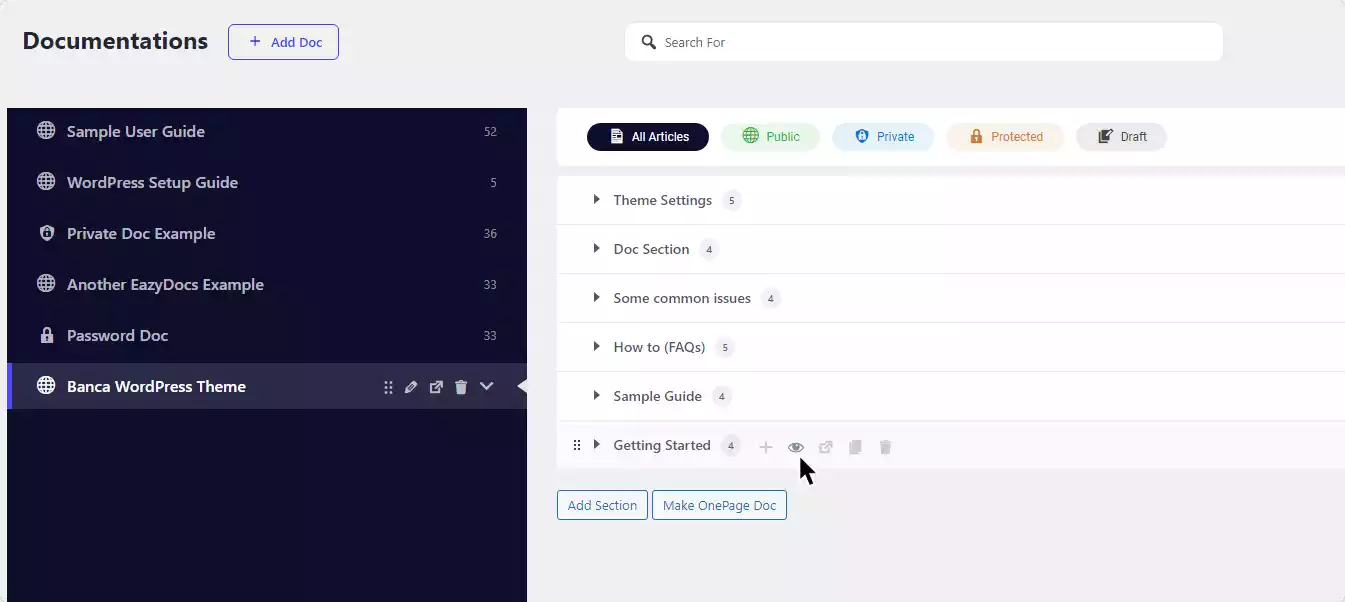
Clicking the Visibility option’s icon will a prompt screen ‘Visibility Options’ will show up. Just select the Password Protected option and click Update.
YouTube Tutorial: How to Create Password-Protected & Internal Documentation
This tutorial covers the step-by-step process of creating password-protected documentation with EazyDocs.
